Colors of the Moon Tutorial

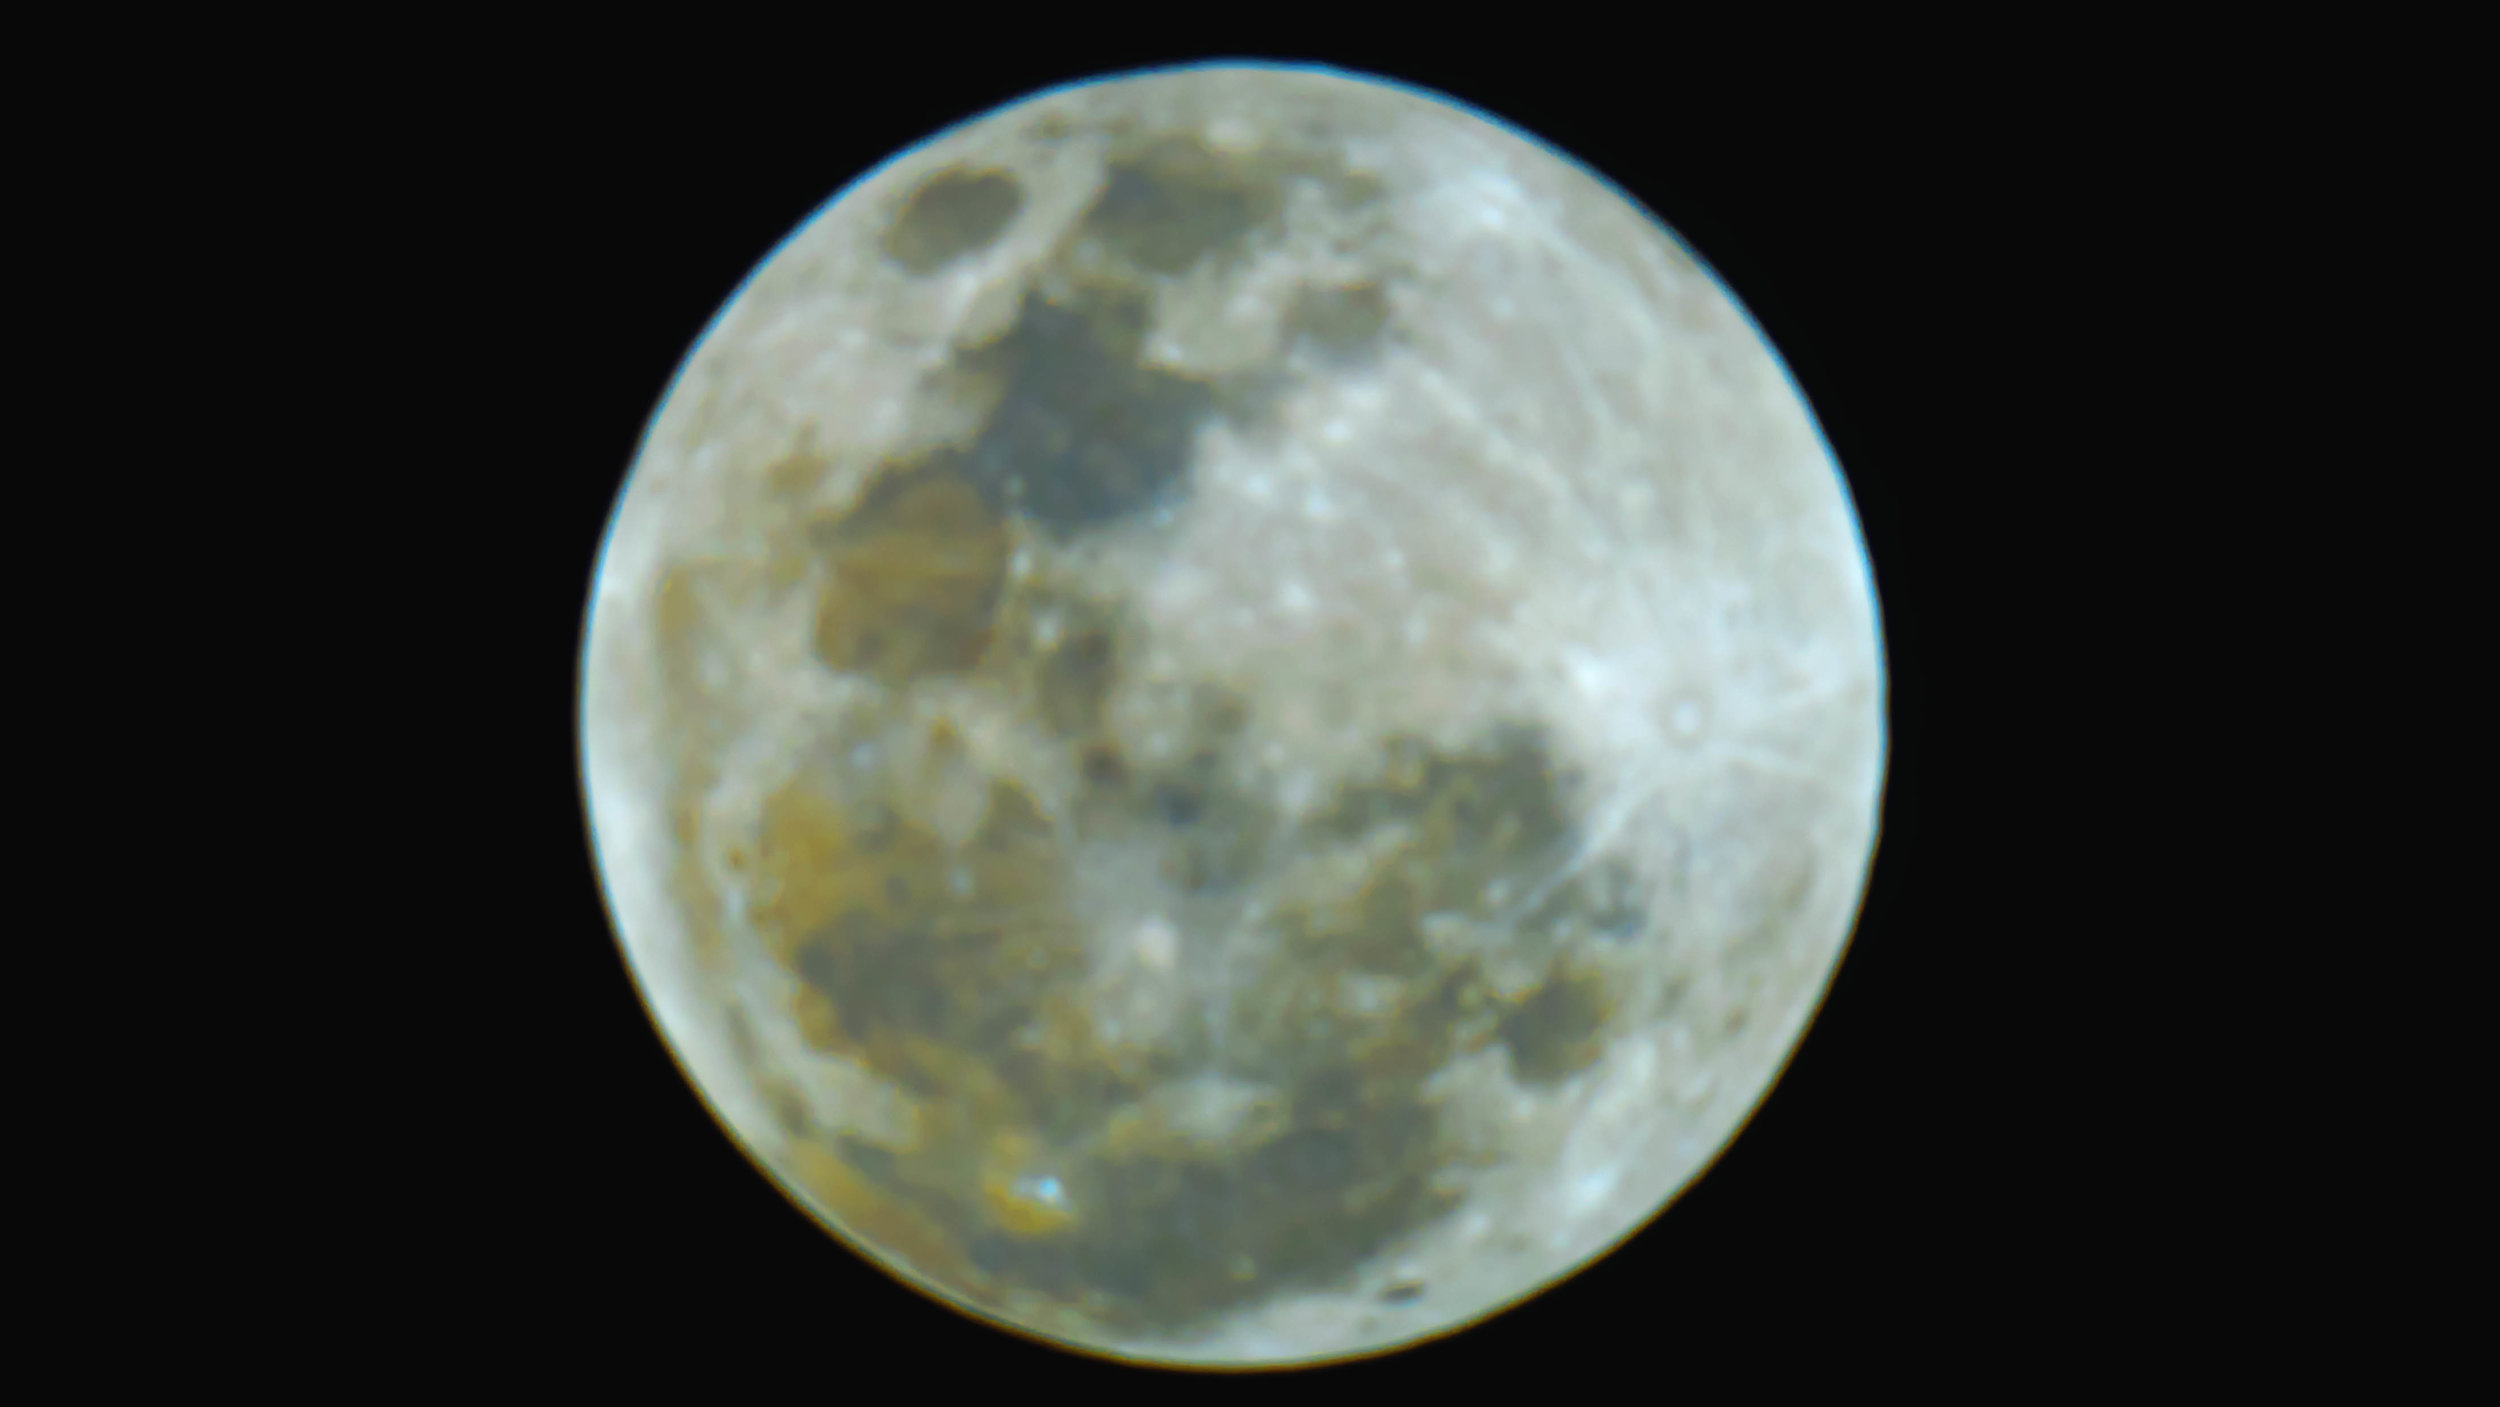
The Moon is normally seen in subtle shades of grey or yellow. But small, measurable color differences have been greatly exaggerated to make this telescopic, multicolored, moonscape captured during the Moon's full phase. The different colors are recognized to correspond to real differences in the chemical makeup of the lunar surface. Blue hues reveal titanium rich areas while orange and purple colors show regions relatively poor in titanium and iron. Calibrated by rock samples from the Apollo missions, similar multicolor images from spacecraft have been used to explore the Moon's global surface composition. - NASA
This image is not hard to accomplish and a great way to image when the moon is full. This can be done with a DSLR and a telephoto lense or a DSLR attached to a telescope. Im sure it can be accomplished with a one shot color but its better of you have control of the ISO as well as exposure time.
This tutorial will use Adobe Lightroom and Photoshop. The biggest problem I found with this process is that Lightroom doesnt stack and align files and Photoshop aligns and stacks but you cant save as a .RAW file. You can stack .Raw files in Deep Sky Stacker or Registax but I found the process to take a long time due to the size of the files.
You have 2 options to stack and process when using the Adobe Programs. You can process each file individually in Lightroom and then stack and process in Photoshop or you can stack in Photoshop, Save as a Tiff and then do an initial process in Lightroom and finish in Photoshop. If you export the stack as a Tiff you still have most .RAW adjustments available to you in Lightroom however the adjustment numbers will vary.
The first step in Lightroom would be to adjust the Temp of the image. If you are in .Raw files you want to adjust the slider so the number is around 4600. if you are using a TIFF the Temp will be around -19. Then move on to the other sliders to match the ones in the image below. Now Ive adjusted exposure because I was slightly over exposed and some of the detail was blown out so that slider you may not need to adjust.
Before:

After:

The end result should be an image of the moon with defined colors. Export the image as a TIFF in 16 Bit.
Now that you have the color image its time to enhance it in Photoshop.
The first enhancement will be to saturate the image. Now you dont want to go heavy on the saturation. Instead we want to increase the color slowly. The way to do this is to increase your saturation to about +10 apply it to the image. Now you will take that layer of saturation and duplicate it approx 5-8 times. Each duplication you will see the colors on the moon deepen. Now if you over saturate it like in the image below then you can just begin to delete the duplicate layers slowly until you get a color image you like.

Now that you have your color image you can make other adjustments you like until you are happy with your image and save. Now you have proof to show anyone who says the moon is just Grey or Black and white that there really is color on the moon, Earth’s only Natural Satellite.
Date: 1/20/19
Location: Astrogazer Observatory
Scope: SVA130
Camera: Nikon D5600 with ISO 160 exposure lengths of 1/250 in RAW format
Processed in Lightroom and Photoshop